証明書・秘密鍵の作成
スクリプトのコピー
端末より管理者になる。
# cp /usr/sbin/make-ssl-cert /usr/sbin/apache2-ssl-cert
スクリプトの確認
/usr/sbin# cat apache2-ssl-cert
・・・・・・・・・・・
# create the certiface.
if [ “”$1″” != “”generate-default-snakeoil”” ]
openssl req -config $TMPFILE -new -x509 -days 3650 -nodes -out $output -keyout $output > /dev/null 2>&1
chmod 600 $output
cd $(dirname $output)
ln -sf $(basename $output) $(openssl x509 -hash -noout -in $(basename $output))
・・・・・・・・・・・
発行される証明書は10年
証明書・秘密鍵を配置するディレクトリを作成
# mkdir /etc/apache2/ssl
スクリプトの実行
/usr/sbin# apache2-ssl-cert /usr/share/ssl-cert/ssleay.cnf /etc/apache2/ssl/apache.pem

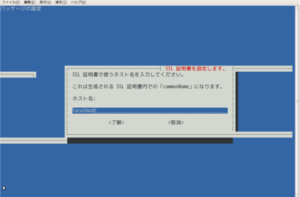
証明書の設定画面が表示される。
「commonName」 ホスト名 に 例○○○.ath.cx 使用するドメイン名を入力して
Tabキーを押して了解を選択してEnterキーを押す。
(ホスト名しか質問されなかった。)
/etc/apache2/ssl に apache.pemファイルが作成される。
(証明書Certificate と 秘密鍵CertificateKey が一つになっているみたい。)
・SSLモジュールをOn(有効)にする。
# a2enmod ssl
リンクを確認する。
/etc/apache2/mods-enabled# ls -la
lrwxrwxrwx 1 root root 26 2009-03-21 22:08 ssl.conf -> ../mods-available/ssl.conf
lrwxrwxrwx 1 root root 26 2009-03-21 22:08 ssl.load -> ../mods-available/ssl.load